This year I am trying out three mushroom kits from Dobies that they had on offer a few weeks back... buy two, get one free ( I am just the perfect customer... offers never fail to win me over!! :) Anyway, after a few tense minutes of pondering, I decided on white button, brown chestnut and yellow oyster mushrooms. Last year I grew a couple of white button mushroom boxes I got from the garden centre.. we ended up with a good crop from one of the boxes, and not such a good crop from the other, but it was still well worth growing them for the sheer enjoyment of seeing them form on top of the casing compost (and we had a multitude of stuffed mushrooms for dinner for a few weeks! :)
 |
| The three kits from Dobies |
The new kits came with some pretty straight forward instructions to follow..... how could I go wrong??!??...oh how naive I am sometimes!!! :) It all sounded so simple for the button mushrooms, and having done pretty well last time, I thought a bumper crop was a foregone conclusion. So far I have nothing showing but a bit of mould on the casing compost, whereas the oyster mushrooms which I thought out of the three would be the ones not to grow, are coming along splendidly!! :)
 |
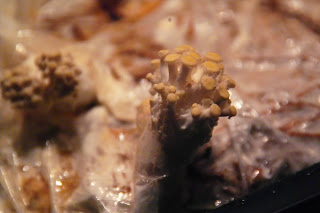
| A group of yellow oyster mushrooms forming |
Yellow oyster mushrooms
Pleurotus ostreatus.
The kit comes with impregnated straw in a plastic bag to grow the mushrooms on, which sits inside a little mini plastic propagator. The plastic bag stays around the substrate all the time, and you just make small incisions in it for the mushrooms to grow through. You keep it in a warm place, 20 - 25 degrees until the straw is covered in white Mycelium, then make the incisions in the bag. After about 10 days or so the mushrooms start to show through the plastic... this is the stage I am at now!! :) I'm not sure how long it will be before I can pick some... but to say I am excited about it is an understatement!!!! Once i've exhausted the first flush of mushrooms, apparently I just make some more incisions in the plastic, and another flush grows through..... happy days!!
 |
| Yellow oyster mushrooms going for gold!! |
Button mushrooms
Agaricus bisporus.
These two kits come in the same mini propagators, but they have a seperate impregnated straw growing substrate, and a dark casing compost to go over the top of it. With this kit you have to place the straw in the bottom of the proagator and keep it warm as you do for the oyster mushrooms until it is covered in the white Mycelium again (completed this part successfully), but then you have to put the casing compost on top of the straw and then apparently the mushrooms grow through the compost..... so far I have a distinct lack of any kind of fungii activity in these two kits... buggar! ... well, unless you can call grey mould on the surface activity?? :( I've given them a good watering at the weekend, as they seemed quite dry under the surface, so now i'm going to wait and see what happens.
I'll keep you posted on my progress with all three kits. I also need to find some oyster mushroom recipes pretty quickly, as it looks like the yellow oyster mushrooms will outgrow their mini propagator in a few days, so i've sorted out an old electric one that doesn't work anymore over the weekend that I can put them in when they reach that point.
I tried these kits once, without success. They always seem like a good idea, but I haven't heard of anyone who has made a big success of them. I think you need to have exactly the right conditions for them to do well.
ReplyDeleteI think you may be right Mark... the conditions must be good for the oyster mushrooms, but no good for the button ones.
ReplyDeleteI just checked them on the way out this morning, and the oyster mushrooms are now pushing the top off the propagator!! :) I don't think the others are going to grow :(
I have a favourite saying... "I'm just a mushroom.....kept in the dark and fed 'shinola'"
ReplyDeleteDo I need to explain 'shinola'? I couldn't put the other word on someone elses Blog :)
We've never grown mushrooms. Fancy having a go but have never been sure about how many you get - assuming they grow...and you're not a health and safety hazard ;)
What's a 'good crop'?
Mo
Mo, i think i get "shinola" :)
ReplyDeleteThe button mushroom boxes i grew last year probably gave me about the equivalent of 6 punnets from the supermarket each over the four or five weeks that they cropped.
These yellow oyster ones are going mad at the moment... i reckon they will be an inch taller tonight when i get back.
Wow, this is really cool! My husband wanted me to look into growing mushrooms and I didn't know you could by these kits. I think you've inspired me to try it out. Thanks!
ReplyDeleteAmy
I have also tried growing button mushrooms. I have a dark, warm place under our stair well (here in Florida, USA), and we were SO miffed when nothing happened. We will give it a couple of weeks more and then call it a day.. or a fortnight, can't make up my mind yet :) Not a quitting kinda gardener.
ReplyDelete